Streamer guide
Run a tier list on stream
Pick a theme, let your viewers submit and label images, then drag them into tiers live — and export the finished board as a PNG. Here's the whole run, start to finish.
How a tier list works
Every list moves through three phases. You control the transitions from the list's settings page — and you can move backward (reopen submissions) or archive a finished list.
| Phase | What it means | What you do |
|---|---|---|
| Draft | Created, not shared yet. | Set the theme and cap. |
| Collecting | Submissions are open. | Share the link; viewers upload. |
| Ranking | Submissions are closed. | Review entries, then rank. |
Sign in
Open the site and click Sign in with Twitch. Everyone — you and your viewers — signs in with Twitch, which keeps submissions accountable to a real account.
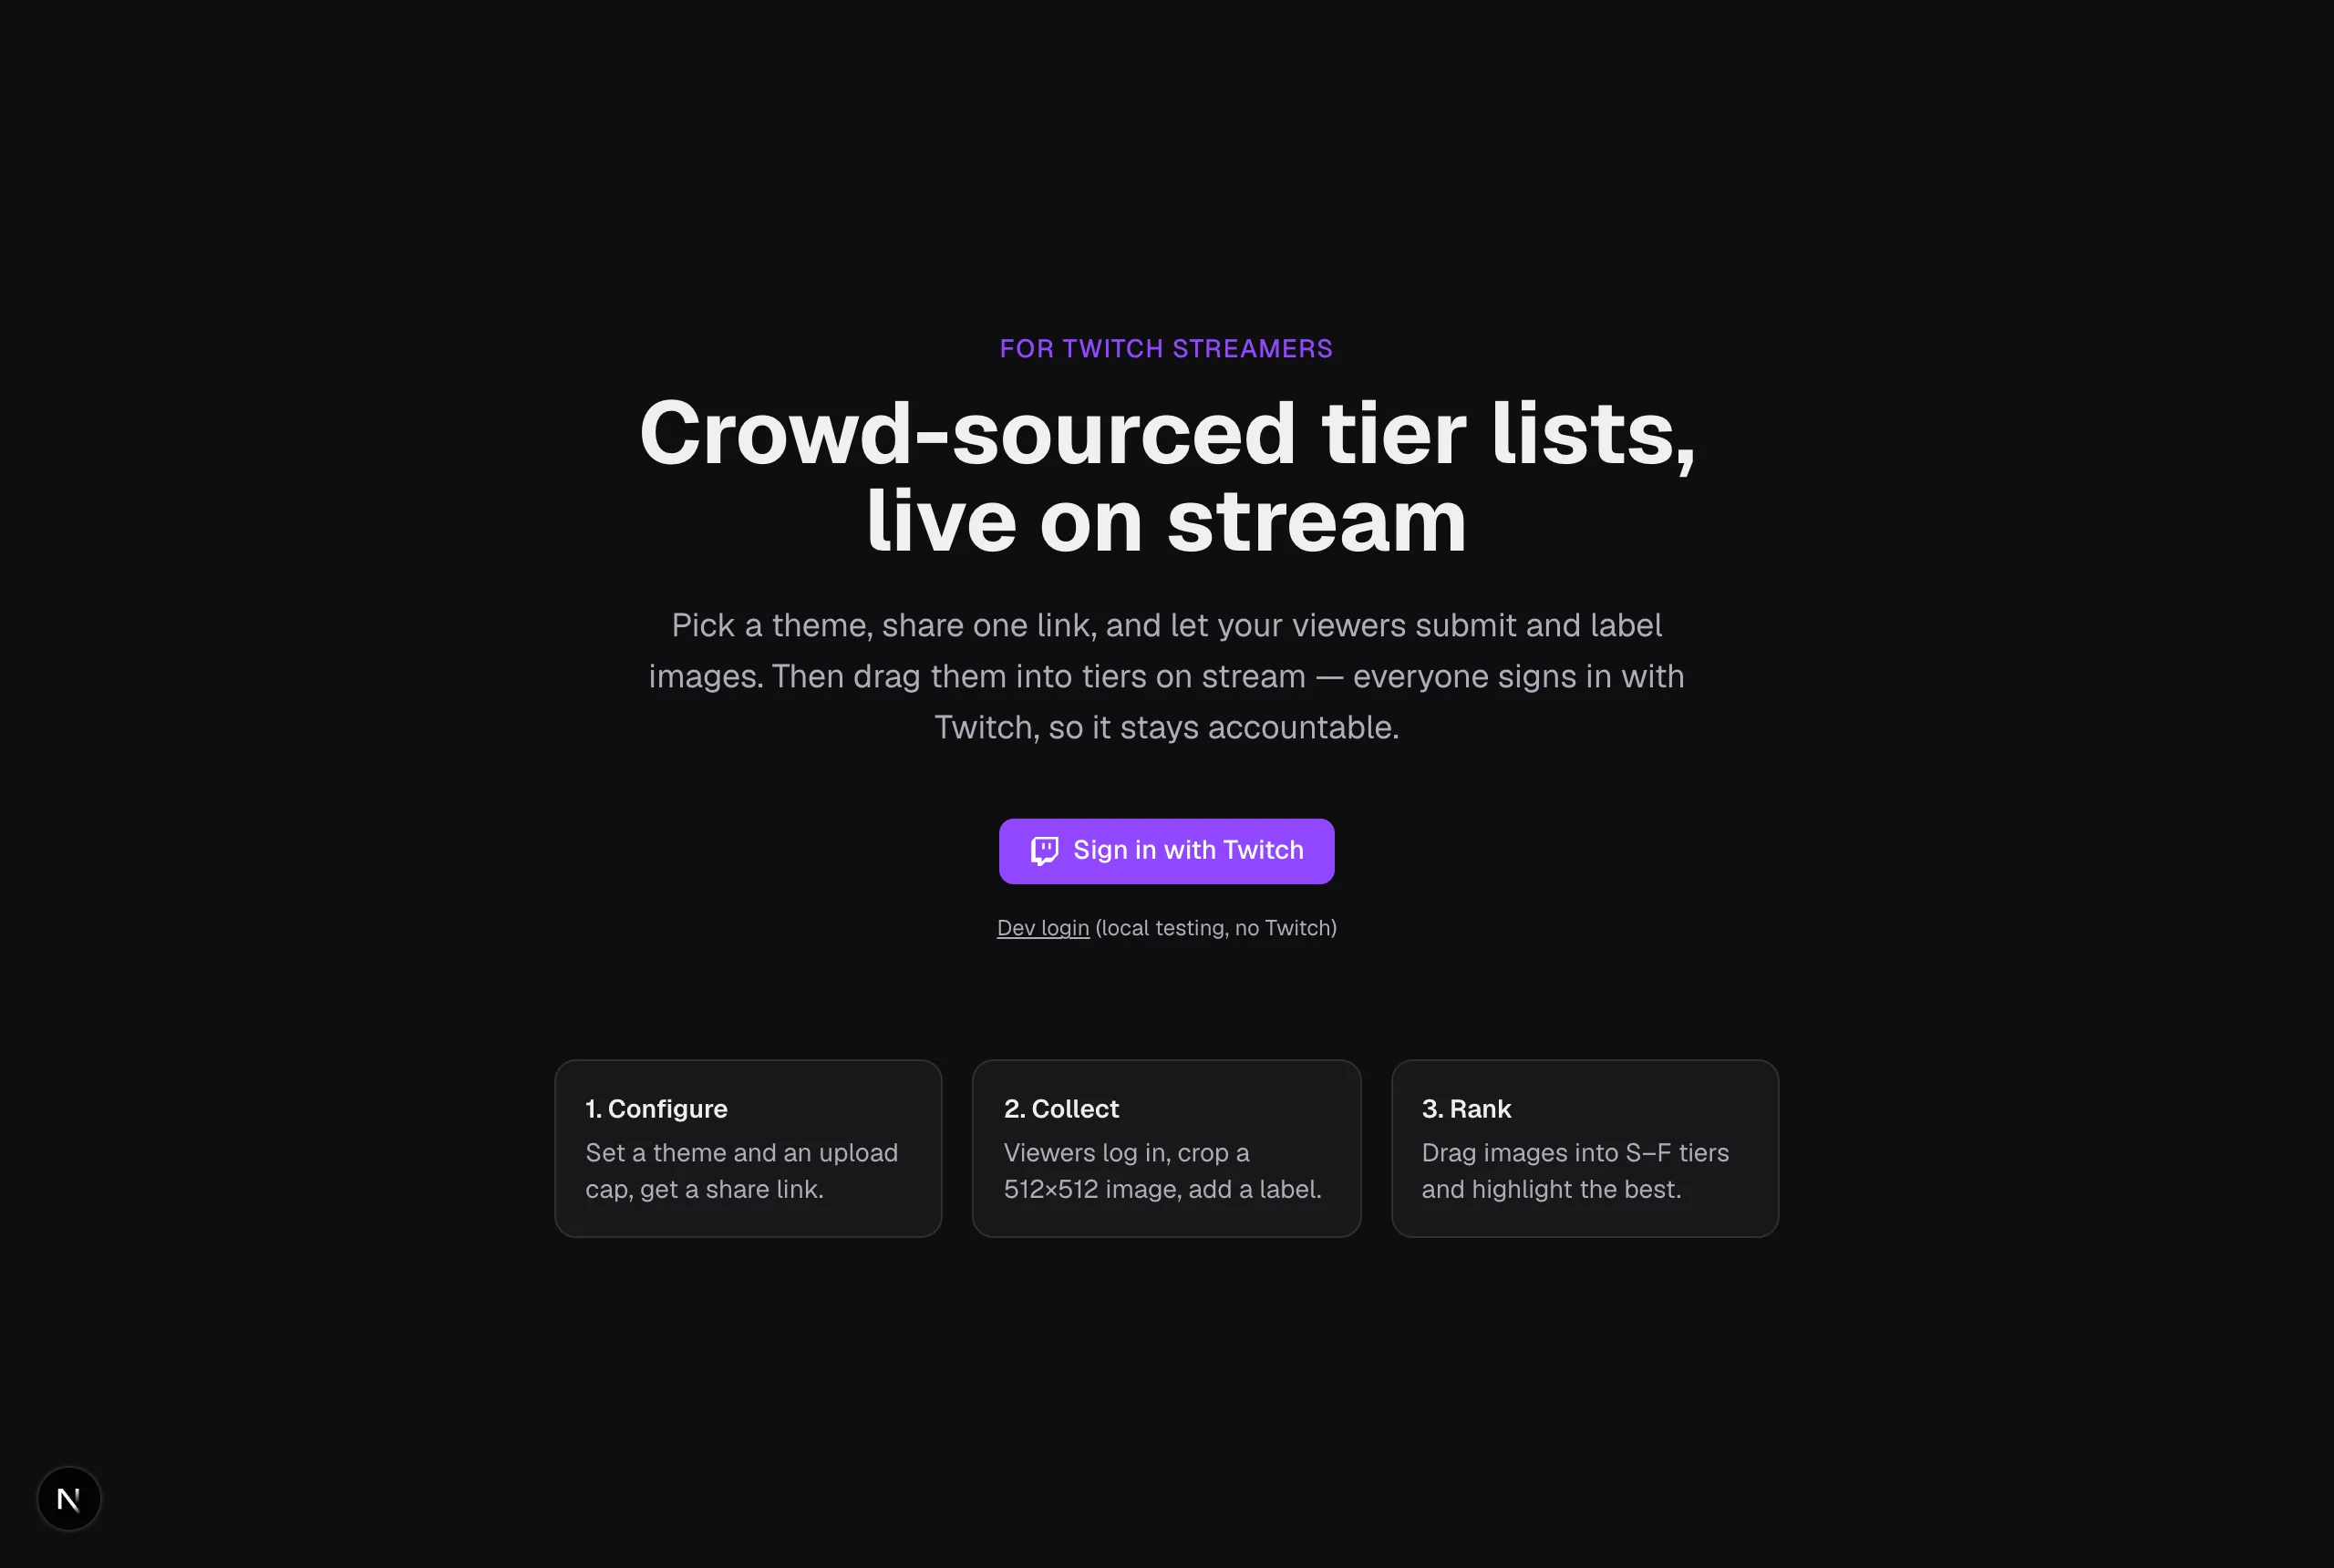
Create a tier list
Your dashboard lists every tier list you own and the phase each one is in. Click New tier list to start one.
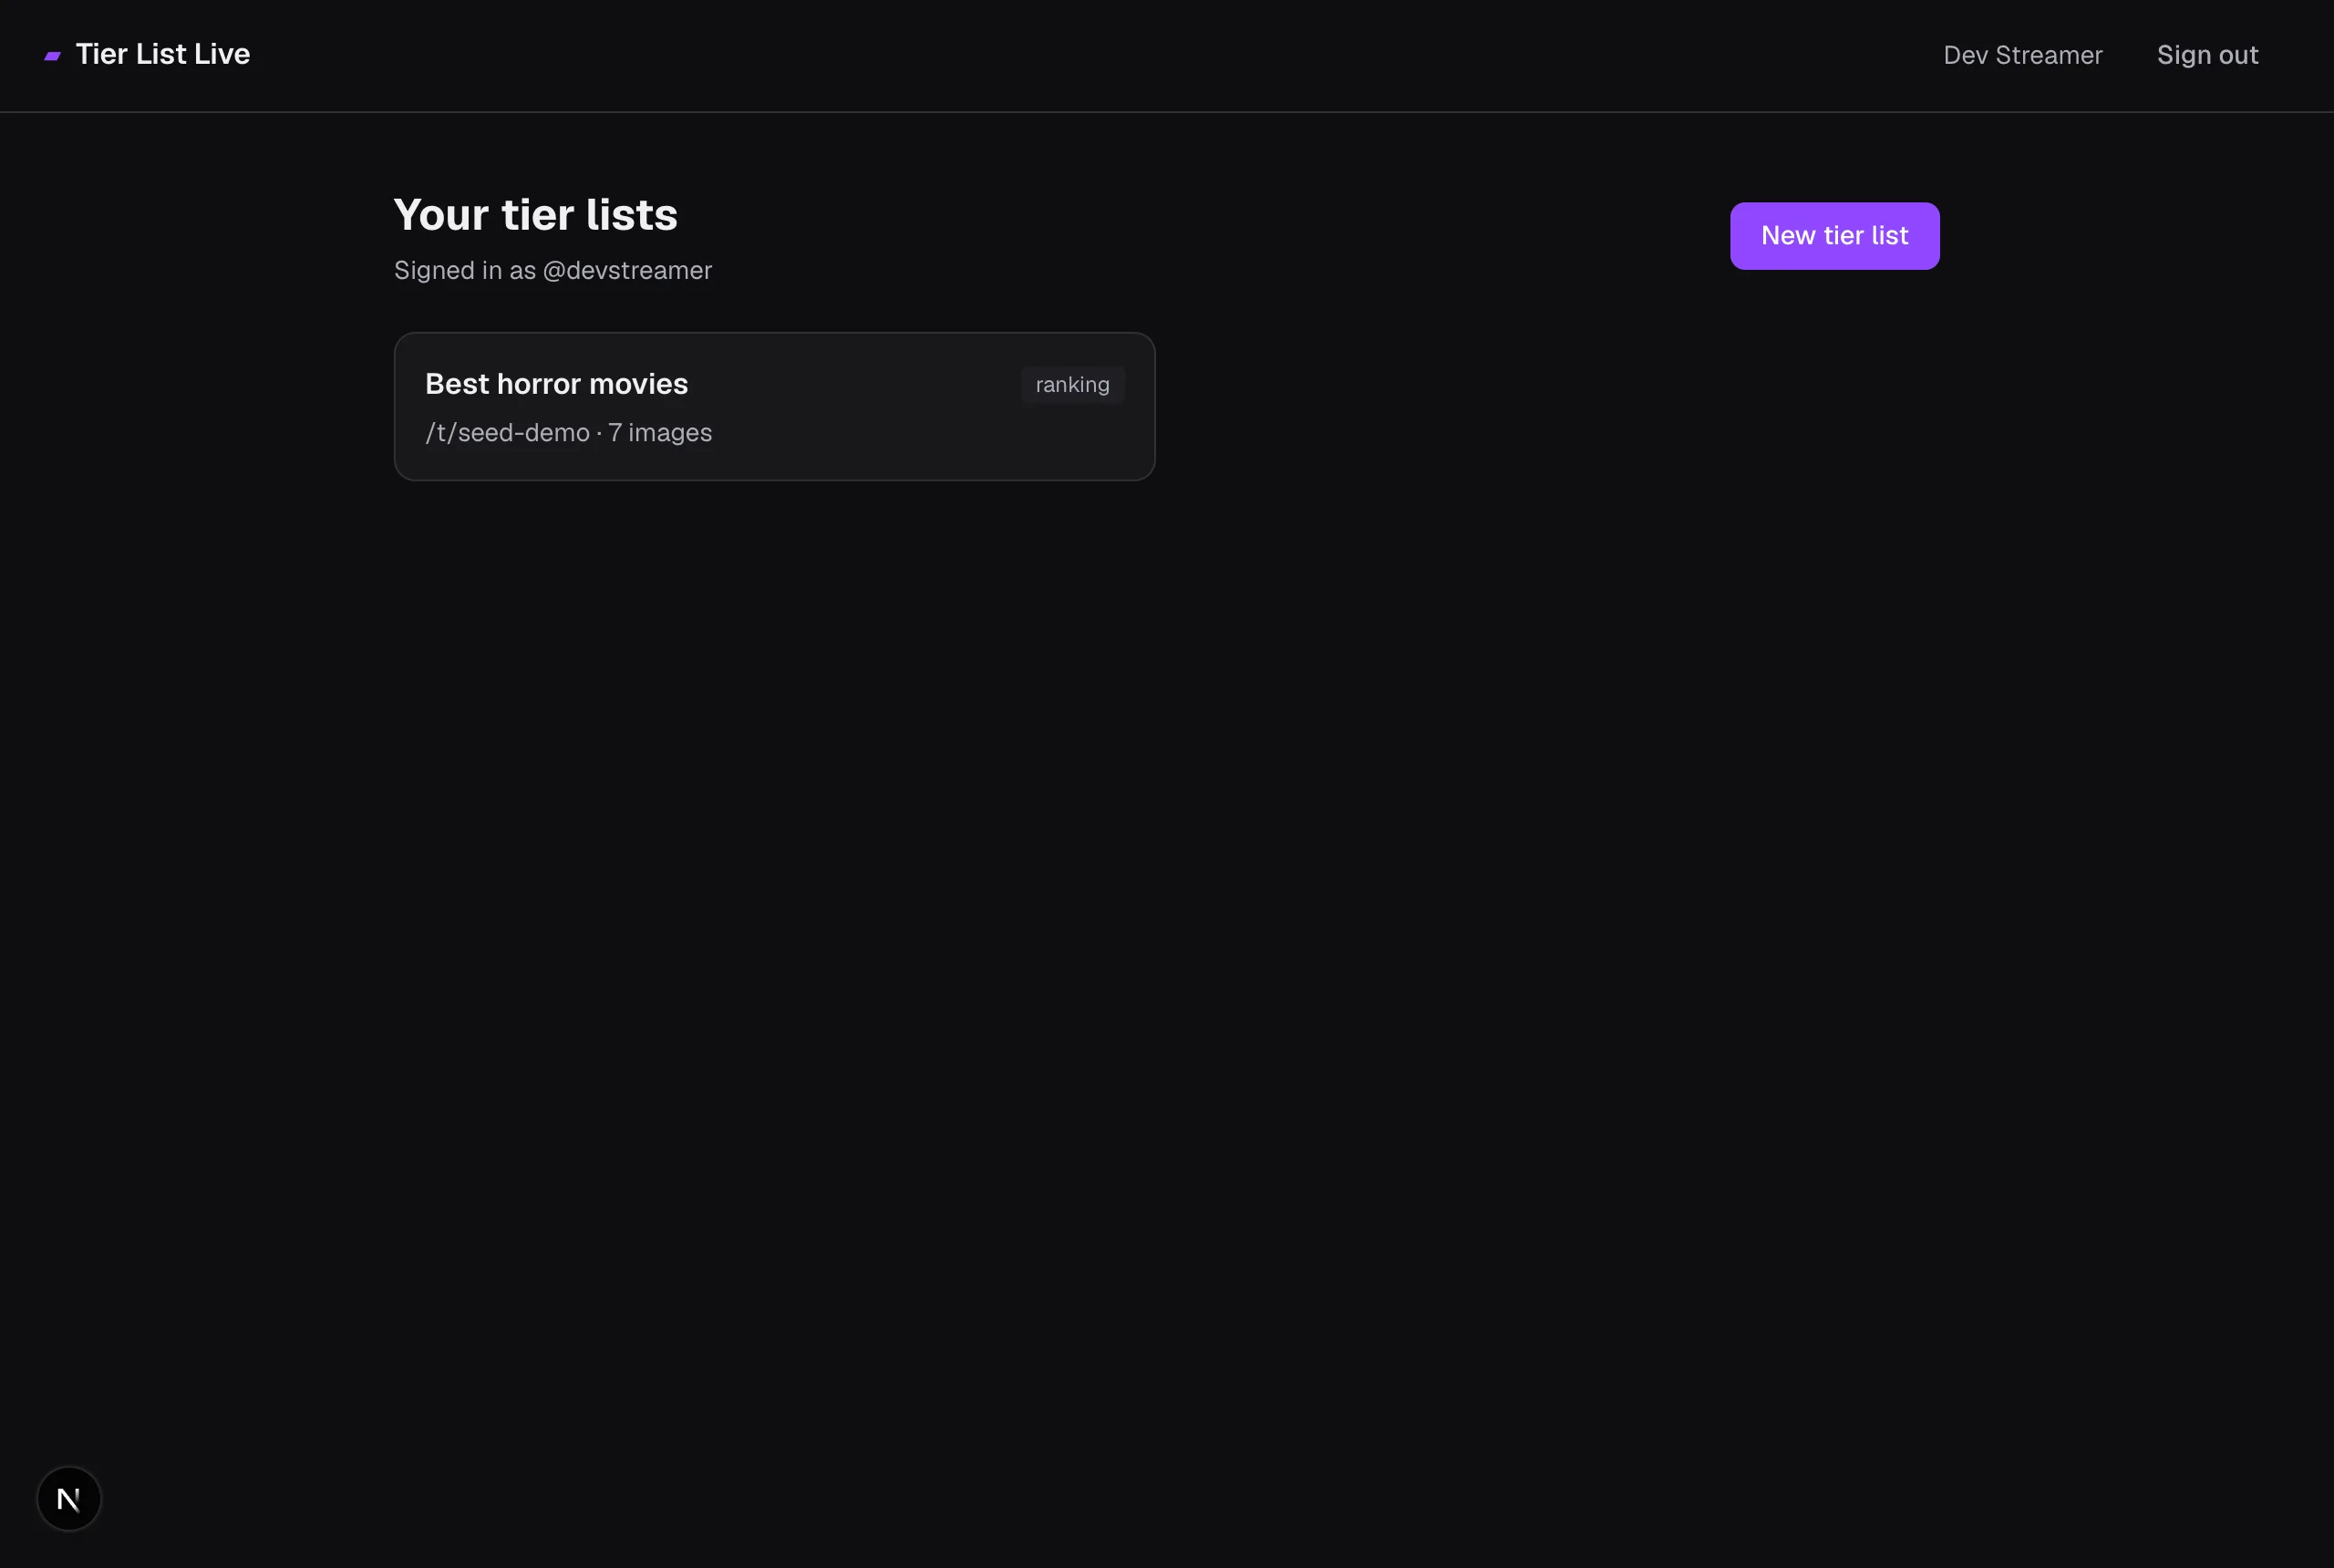
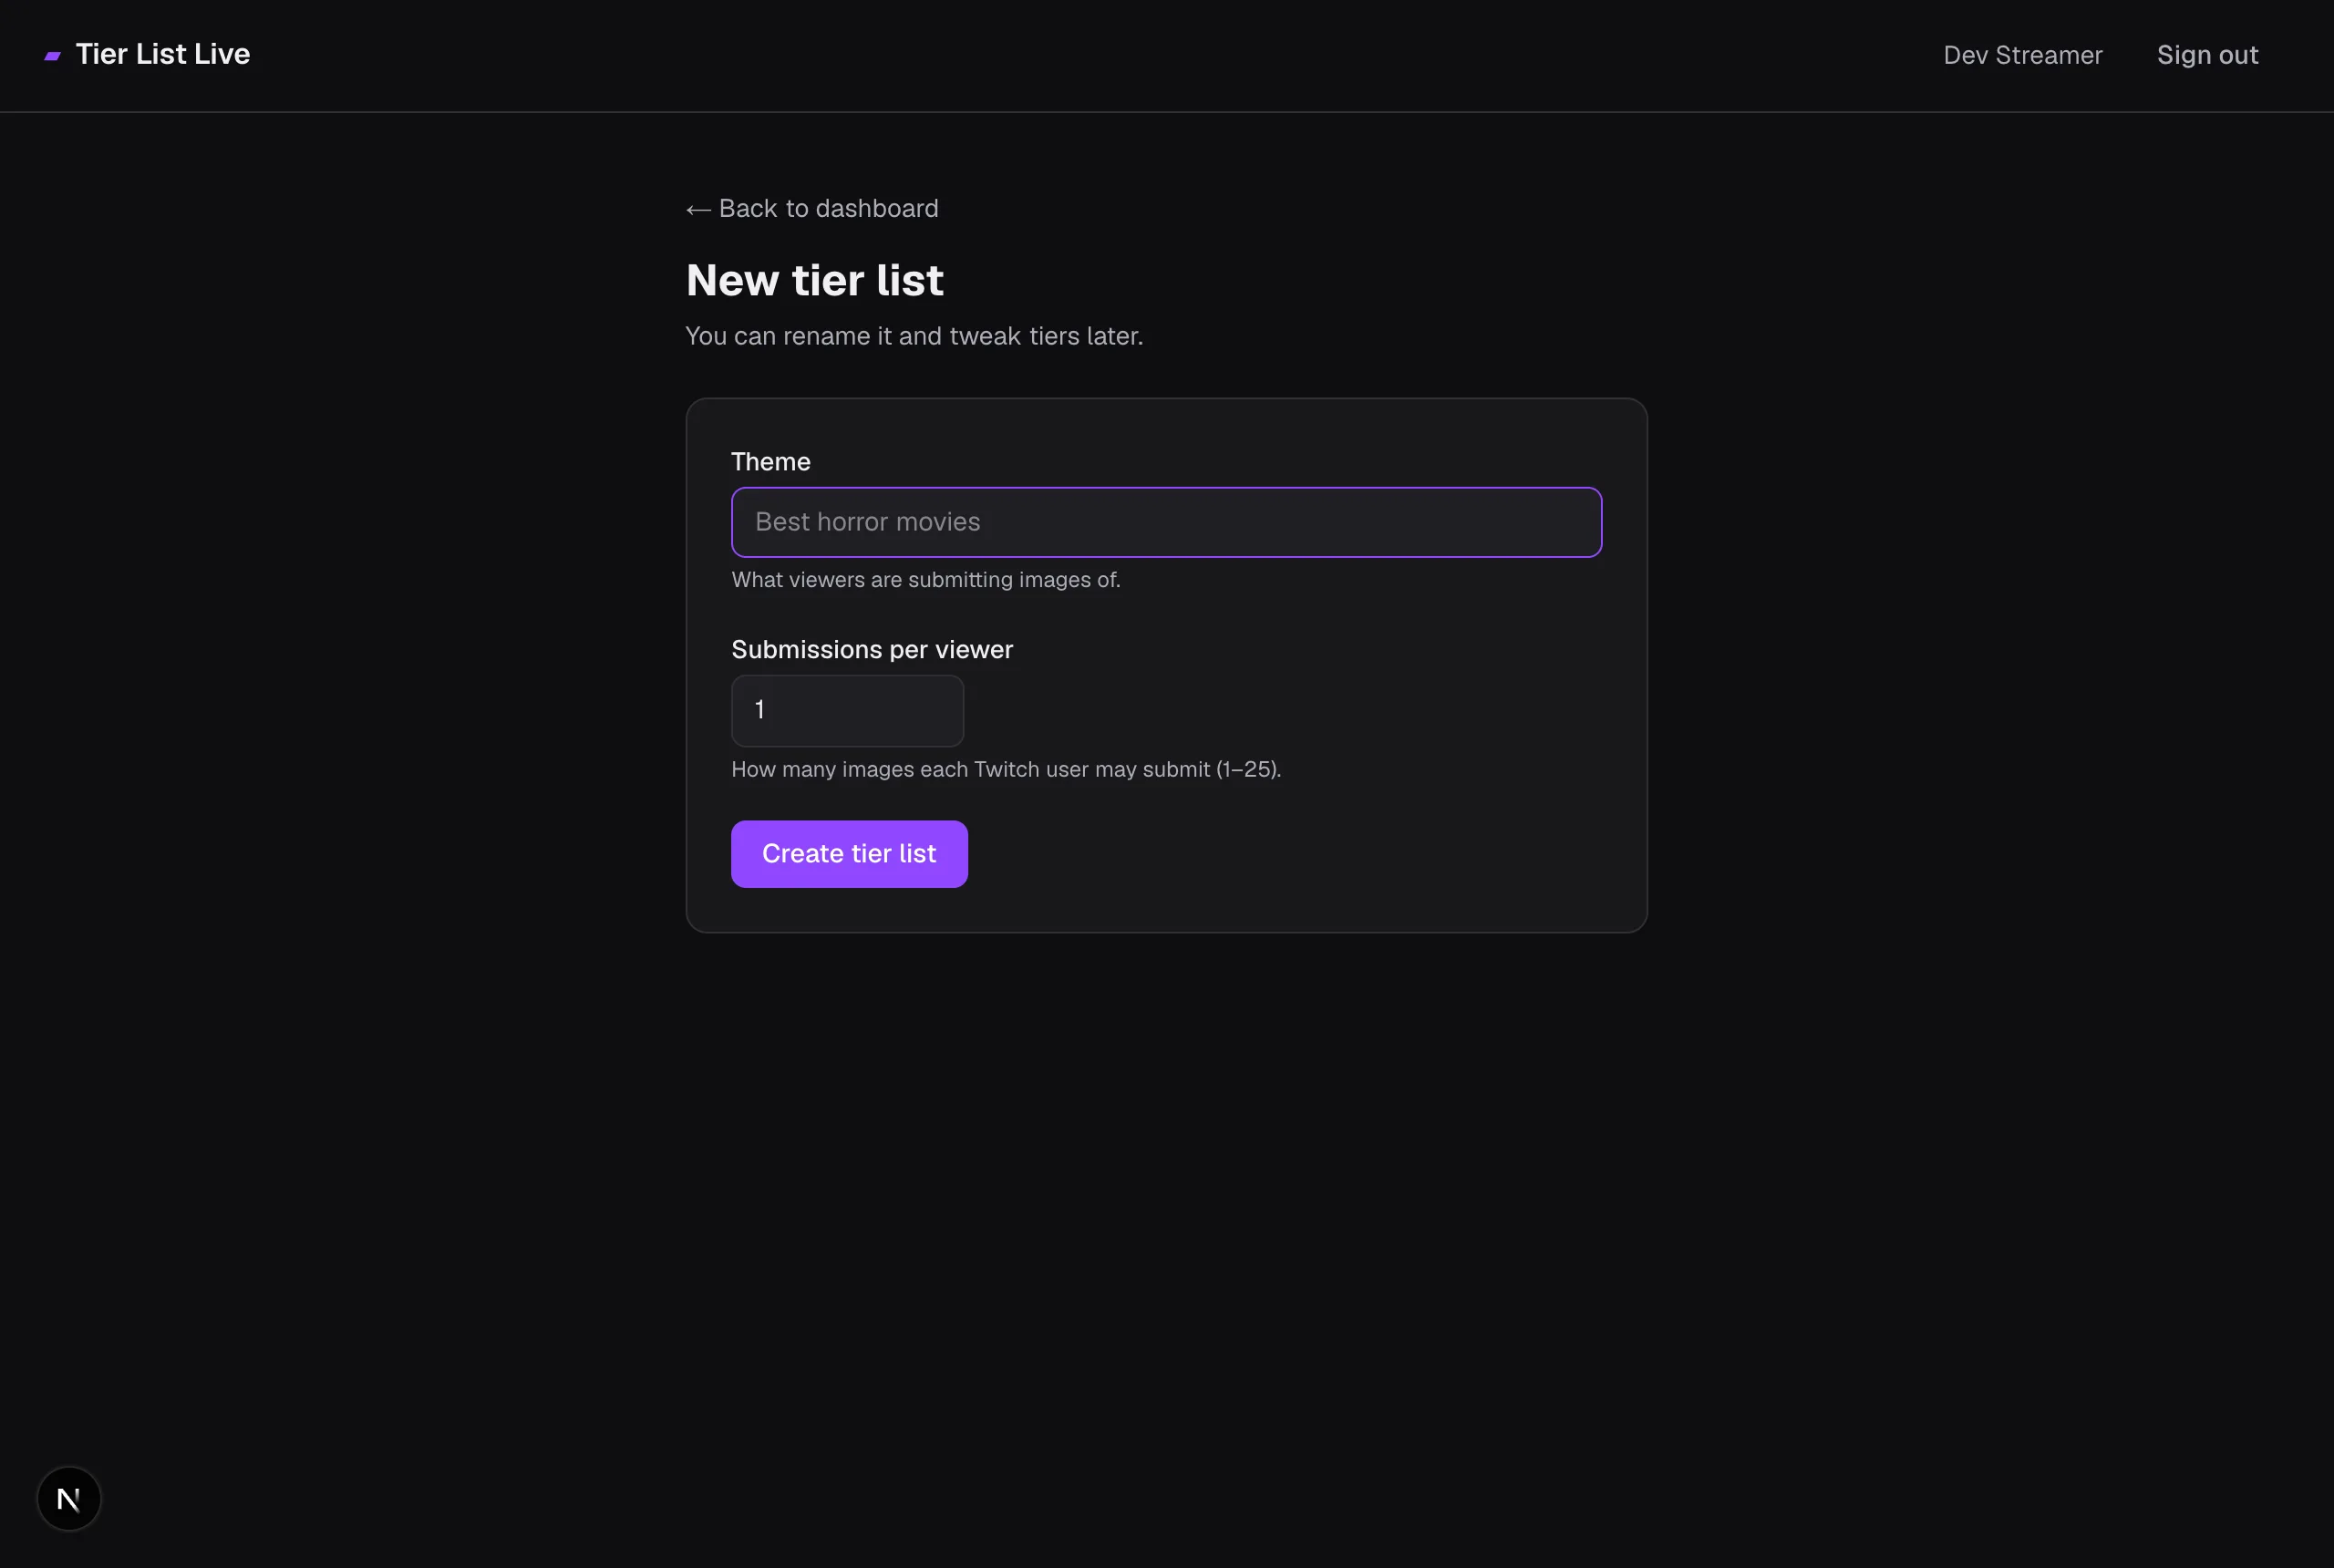
Fill in two things — you can change both later:
- Theme — what viewers submit images of (e.g. “Best horror movies”).
- Submissions per viewer — how many images each Twitch account may upload (1–25). Keep it low (1–3) for a big audience so the pool stays manageable.
The settings page (your control room)
Every list has a settings page with everything you need, top to bottom.
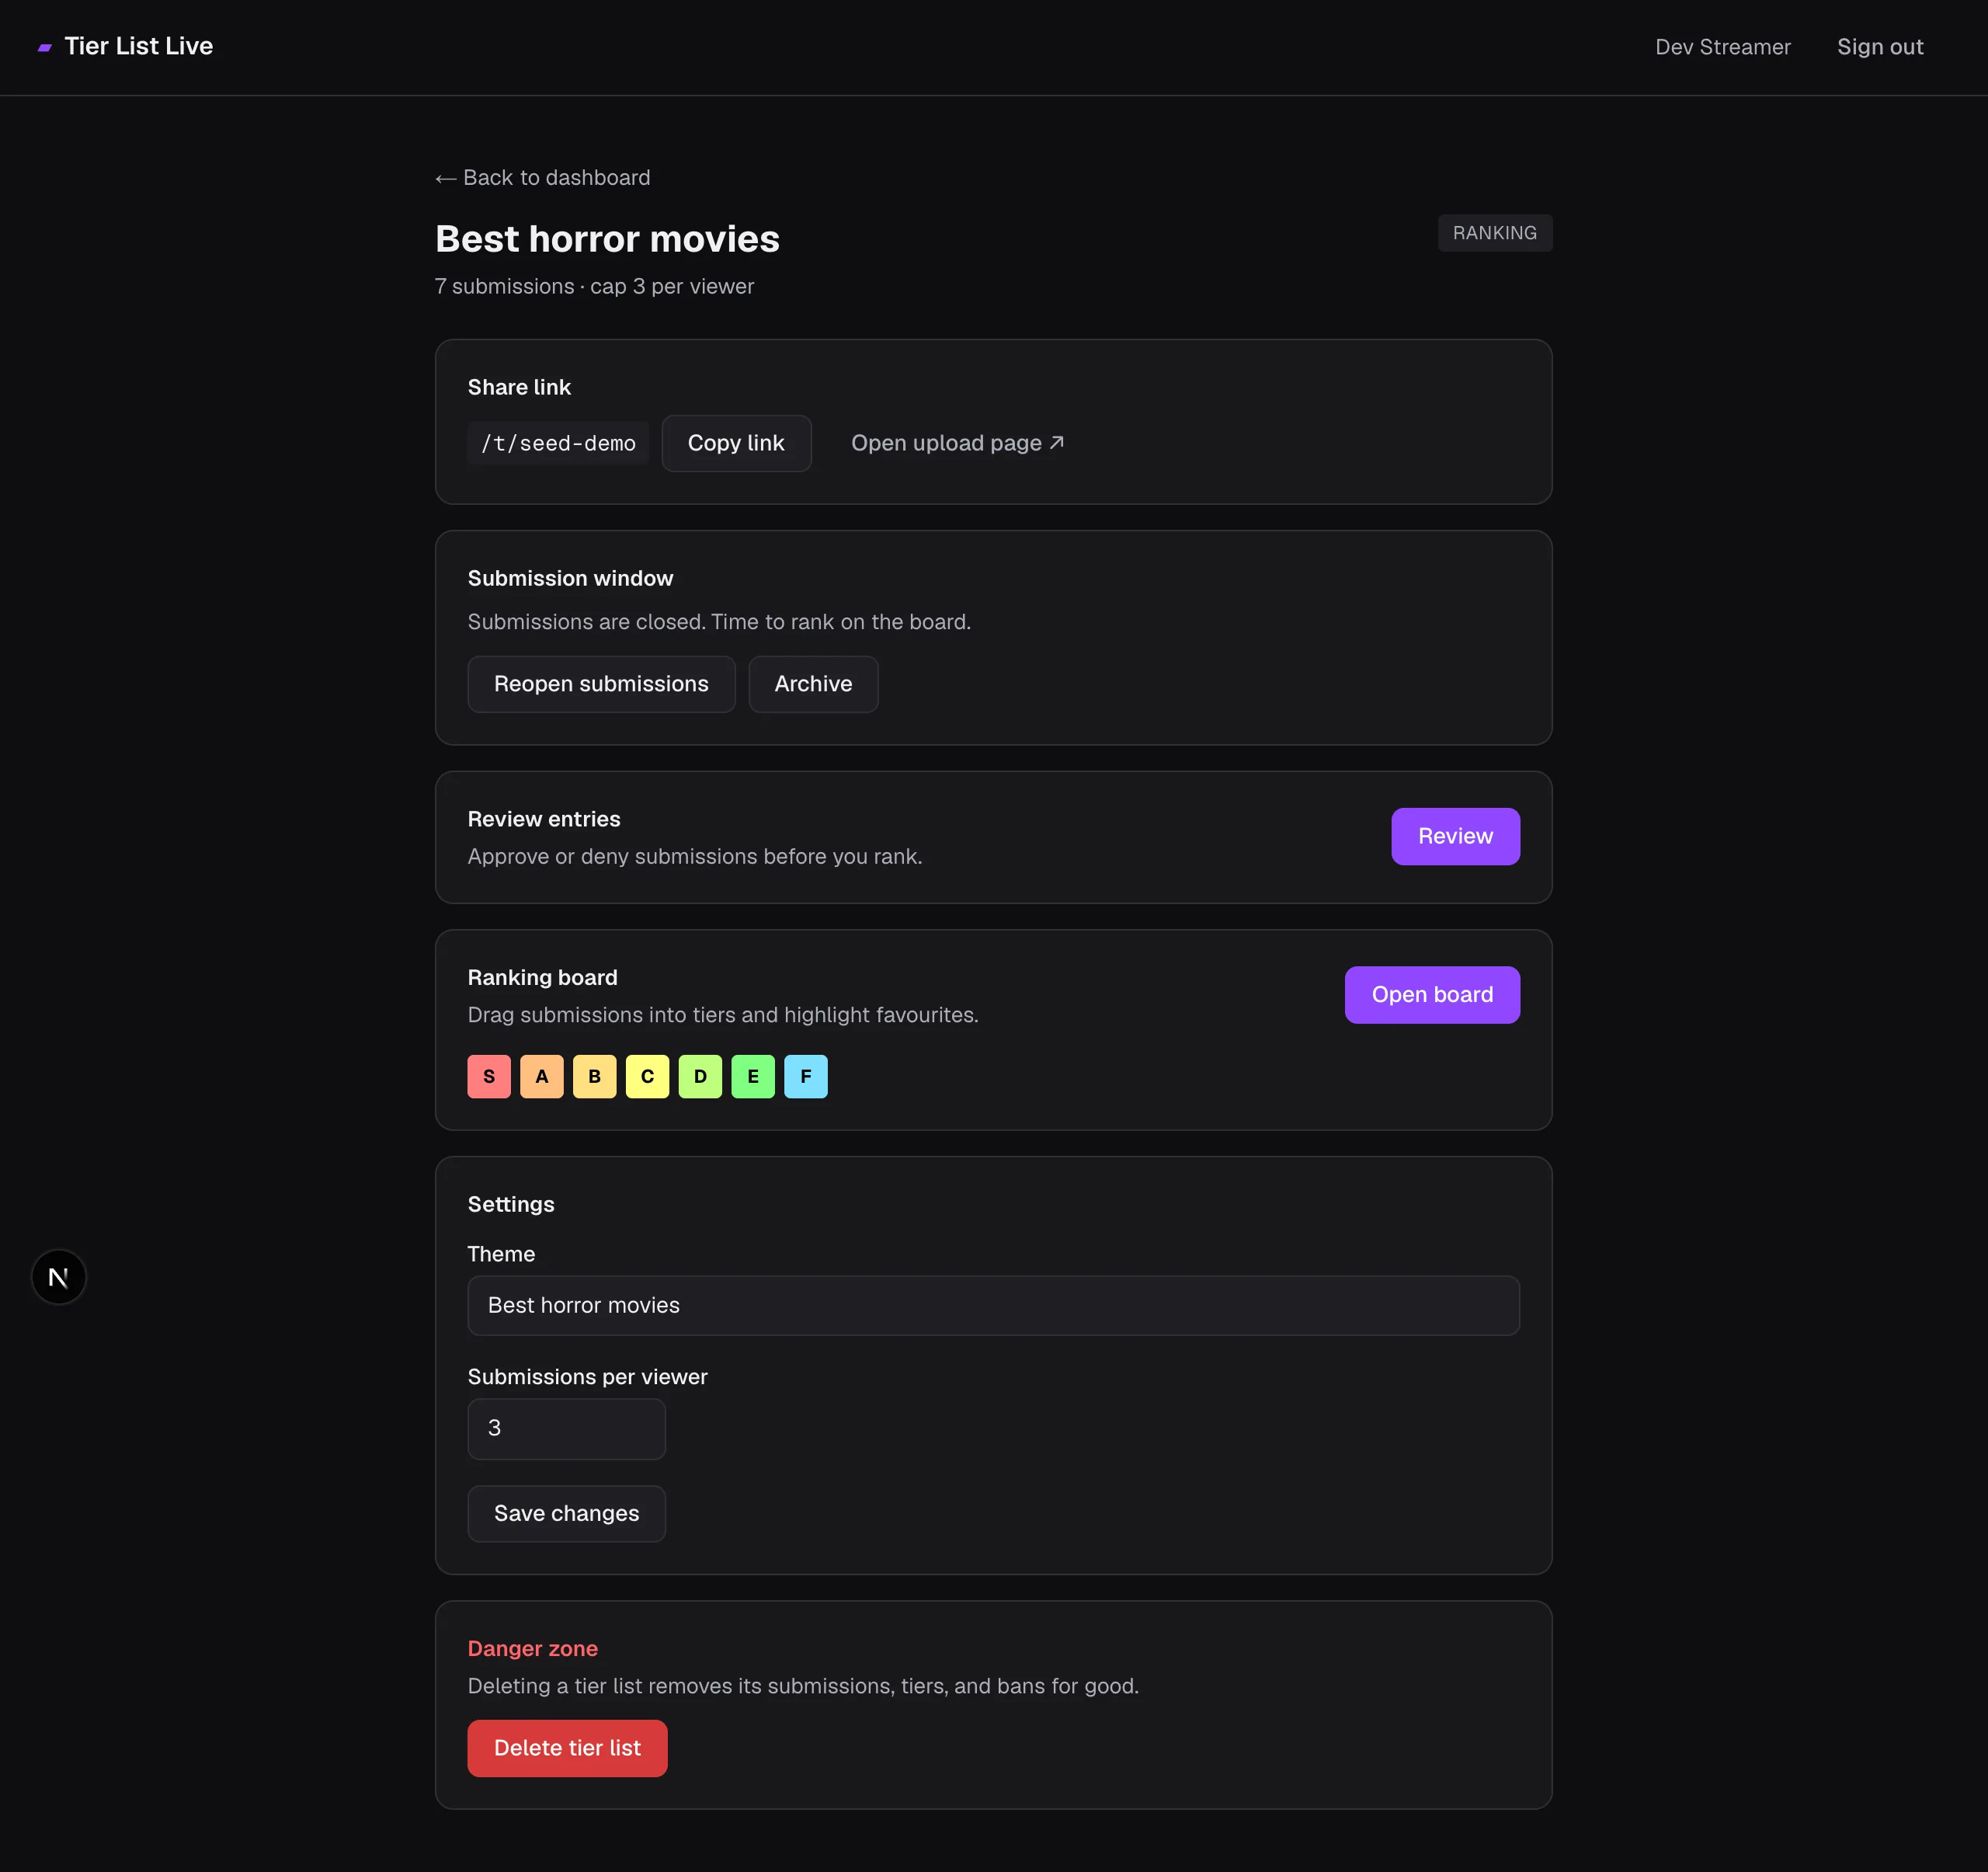
- Share link — the
/t/…URL viewers use to submit. Copy link puts it on your clipboard; Open upload page previews what viewers see. - Submission window — opens and closes submissions.
- Review entries — appears once submissions are closed; approve or deny images before they reach the board.
- Ranking board — Open board takes you to the live ranking screen. The colored chips preview your tiers.
- Settings — rename the theme or change the cap, then Save changes.
- Danger zone — Delete tier list removes the list and everything in it permanently.
Open submissions and share the link
In Submission window, click Open submissions. The list moves to Collecting and the share link goes live.
Copy the /t/… link and drop it wherever your audience is — Twitch chat, a panel, a chat command, or your overlay.
What your viewers see
At the share link, a signed-in viewer clicks Choose image, crops it to a square, adds a label, and submits — up to the cap you set. The cropping and 512×512 resize happen in their browser; only the finished image is uploaded. The page shows a running gallery of what's come in.
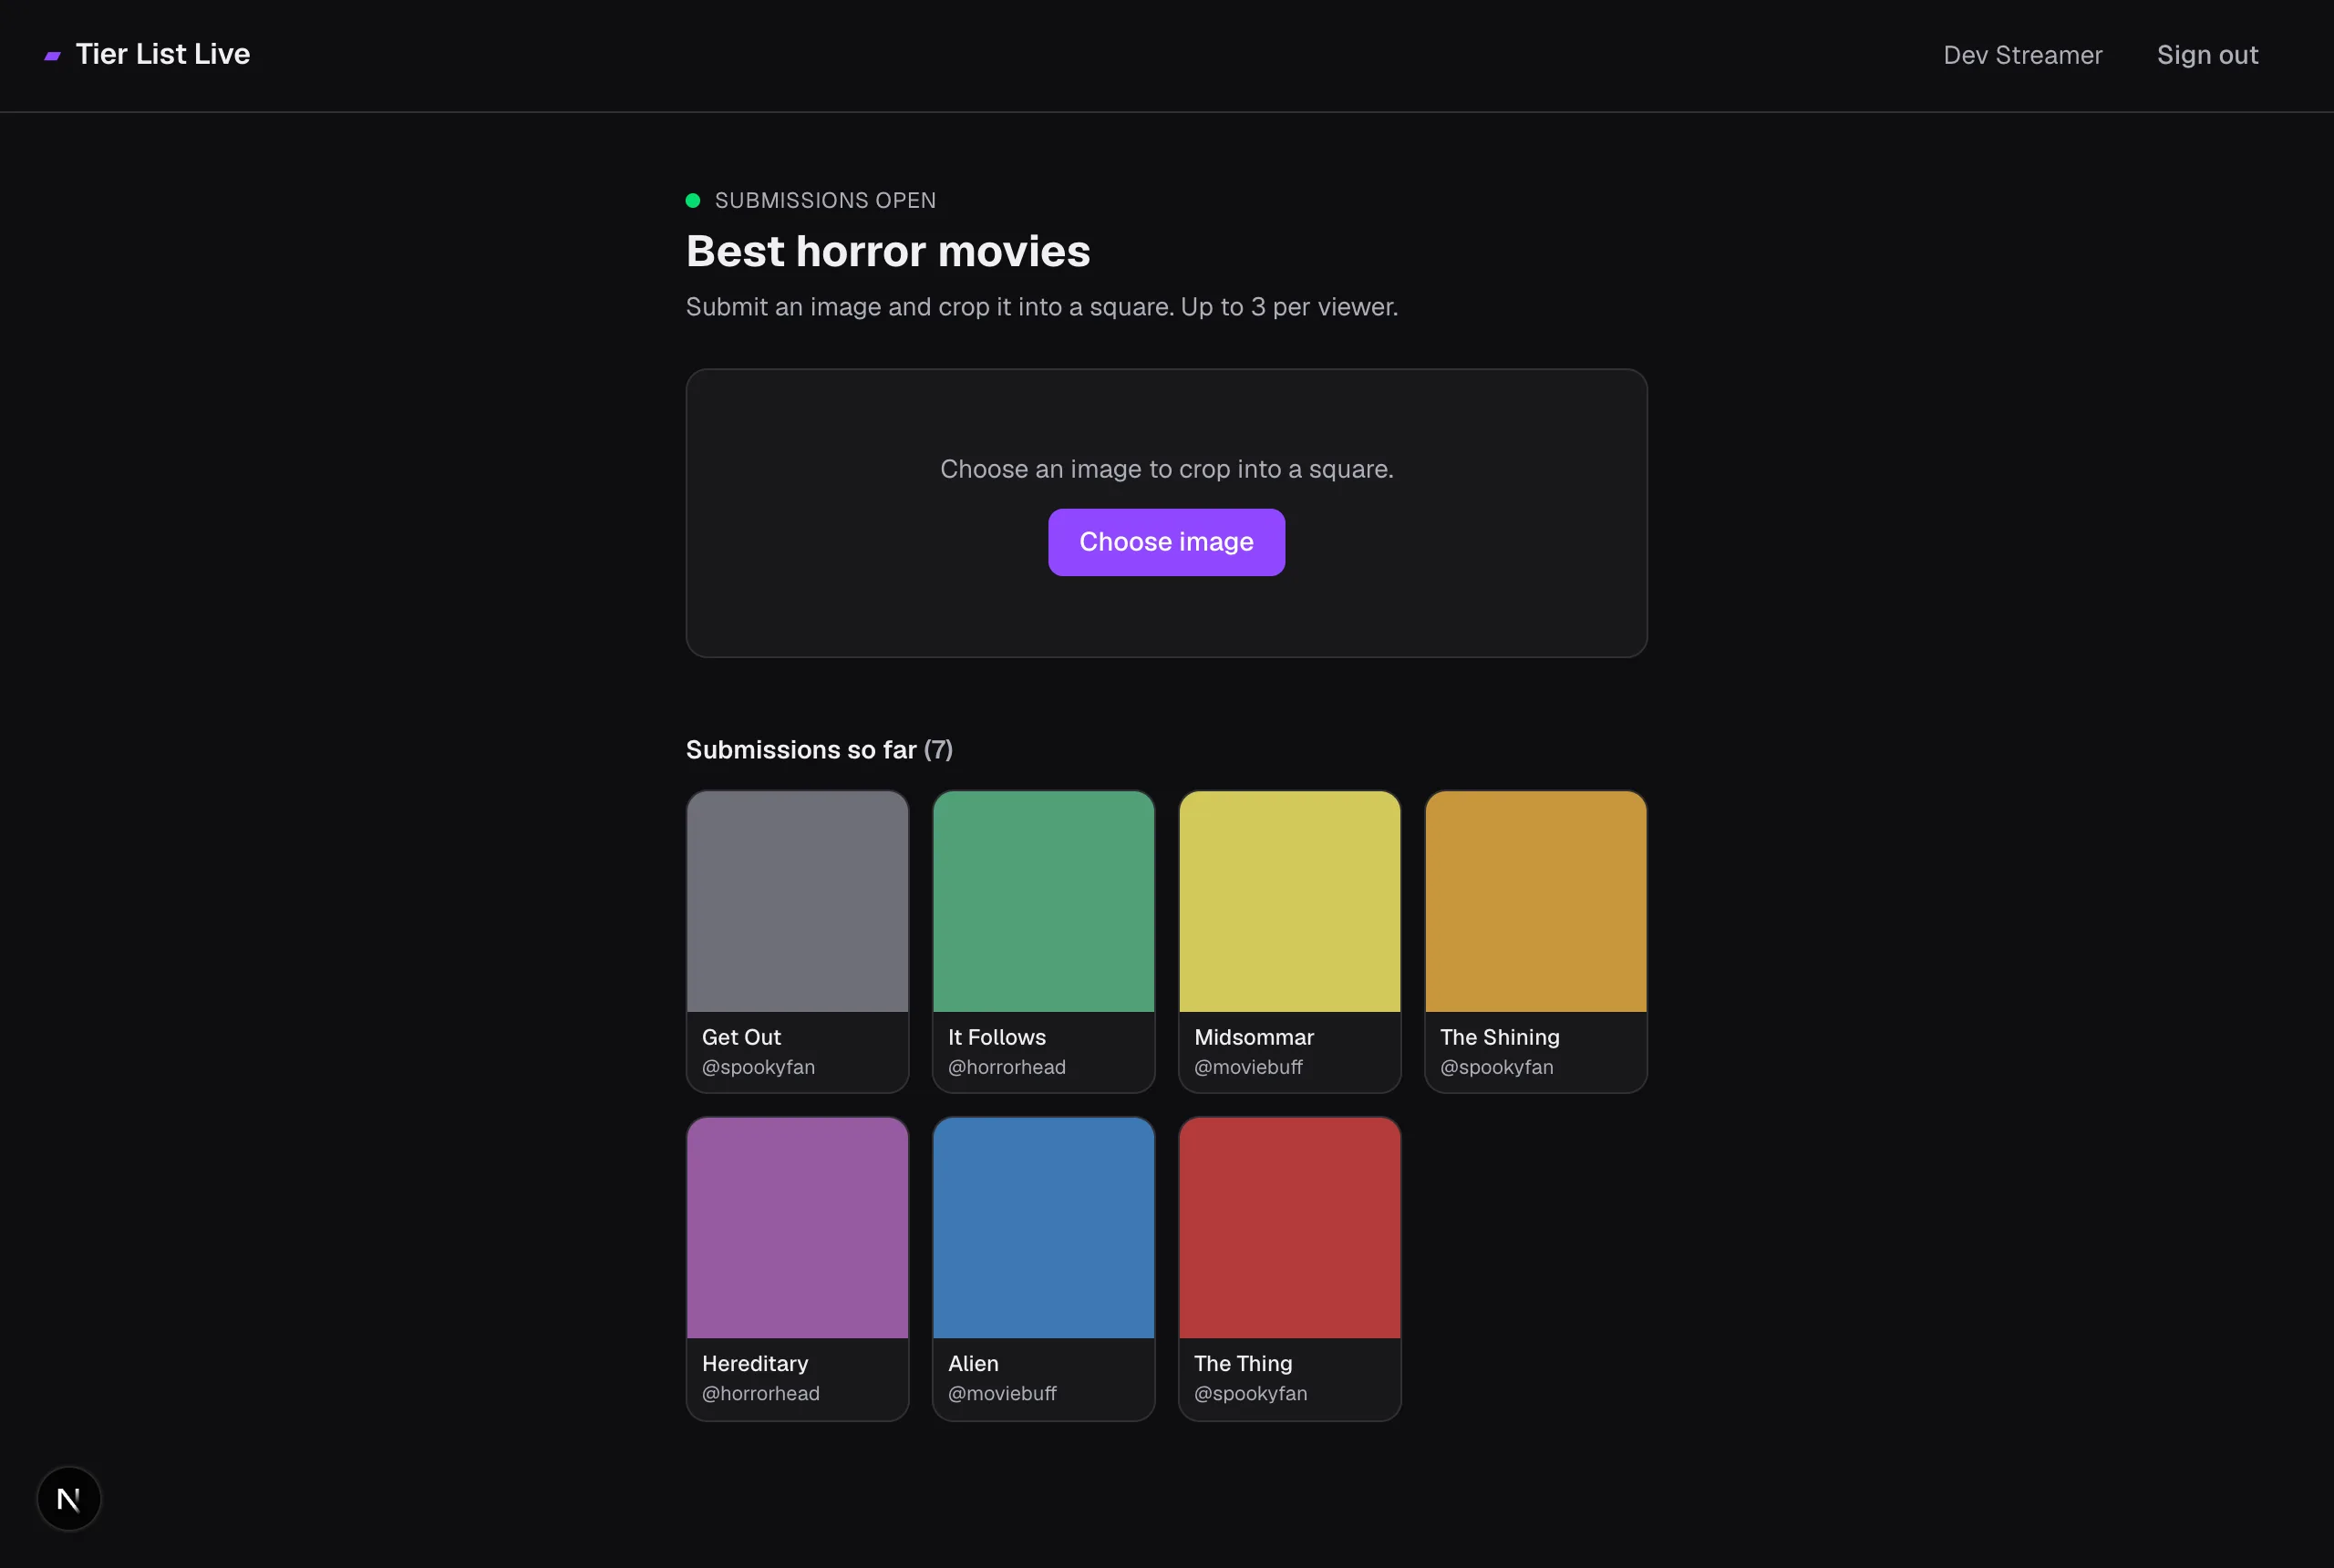
Want to give your audience a walkthrough? Point them at the How to submit guide.
Close submissions and review
When you're ready, click Close submissions & start ranking. Viewers can no longer upload. Then click Review to vet the pool — only approved entries appear on the board, so this is your moderation gate against off-theme uploads.
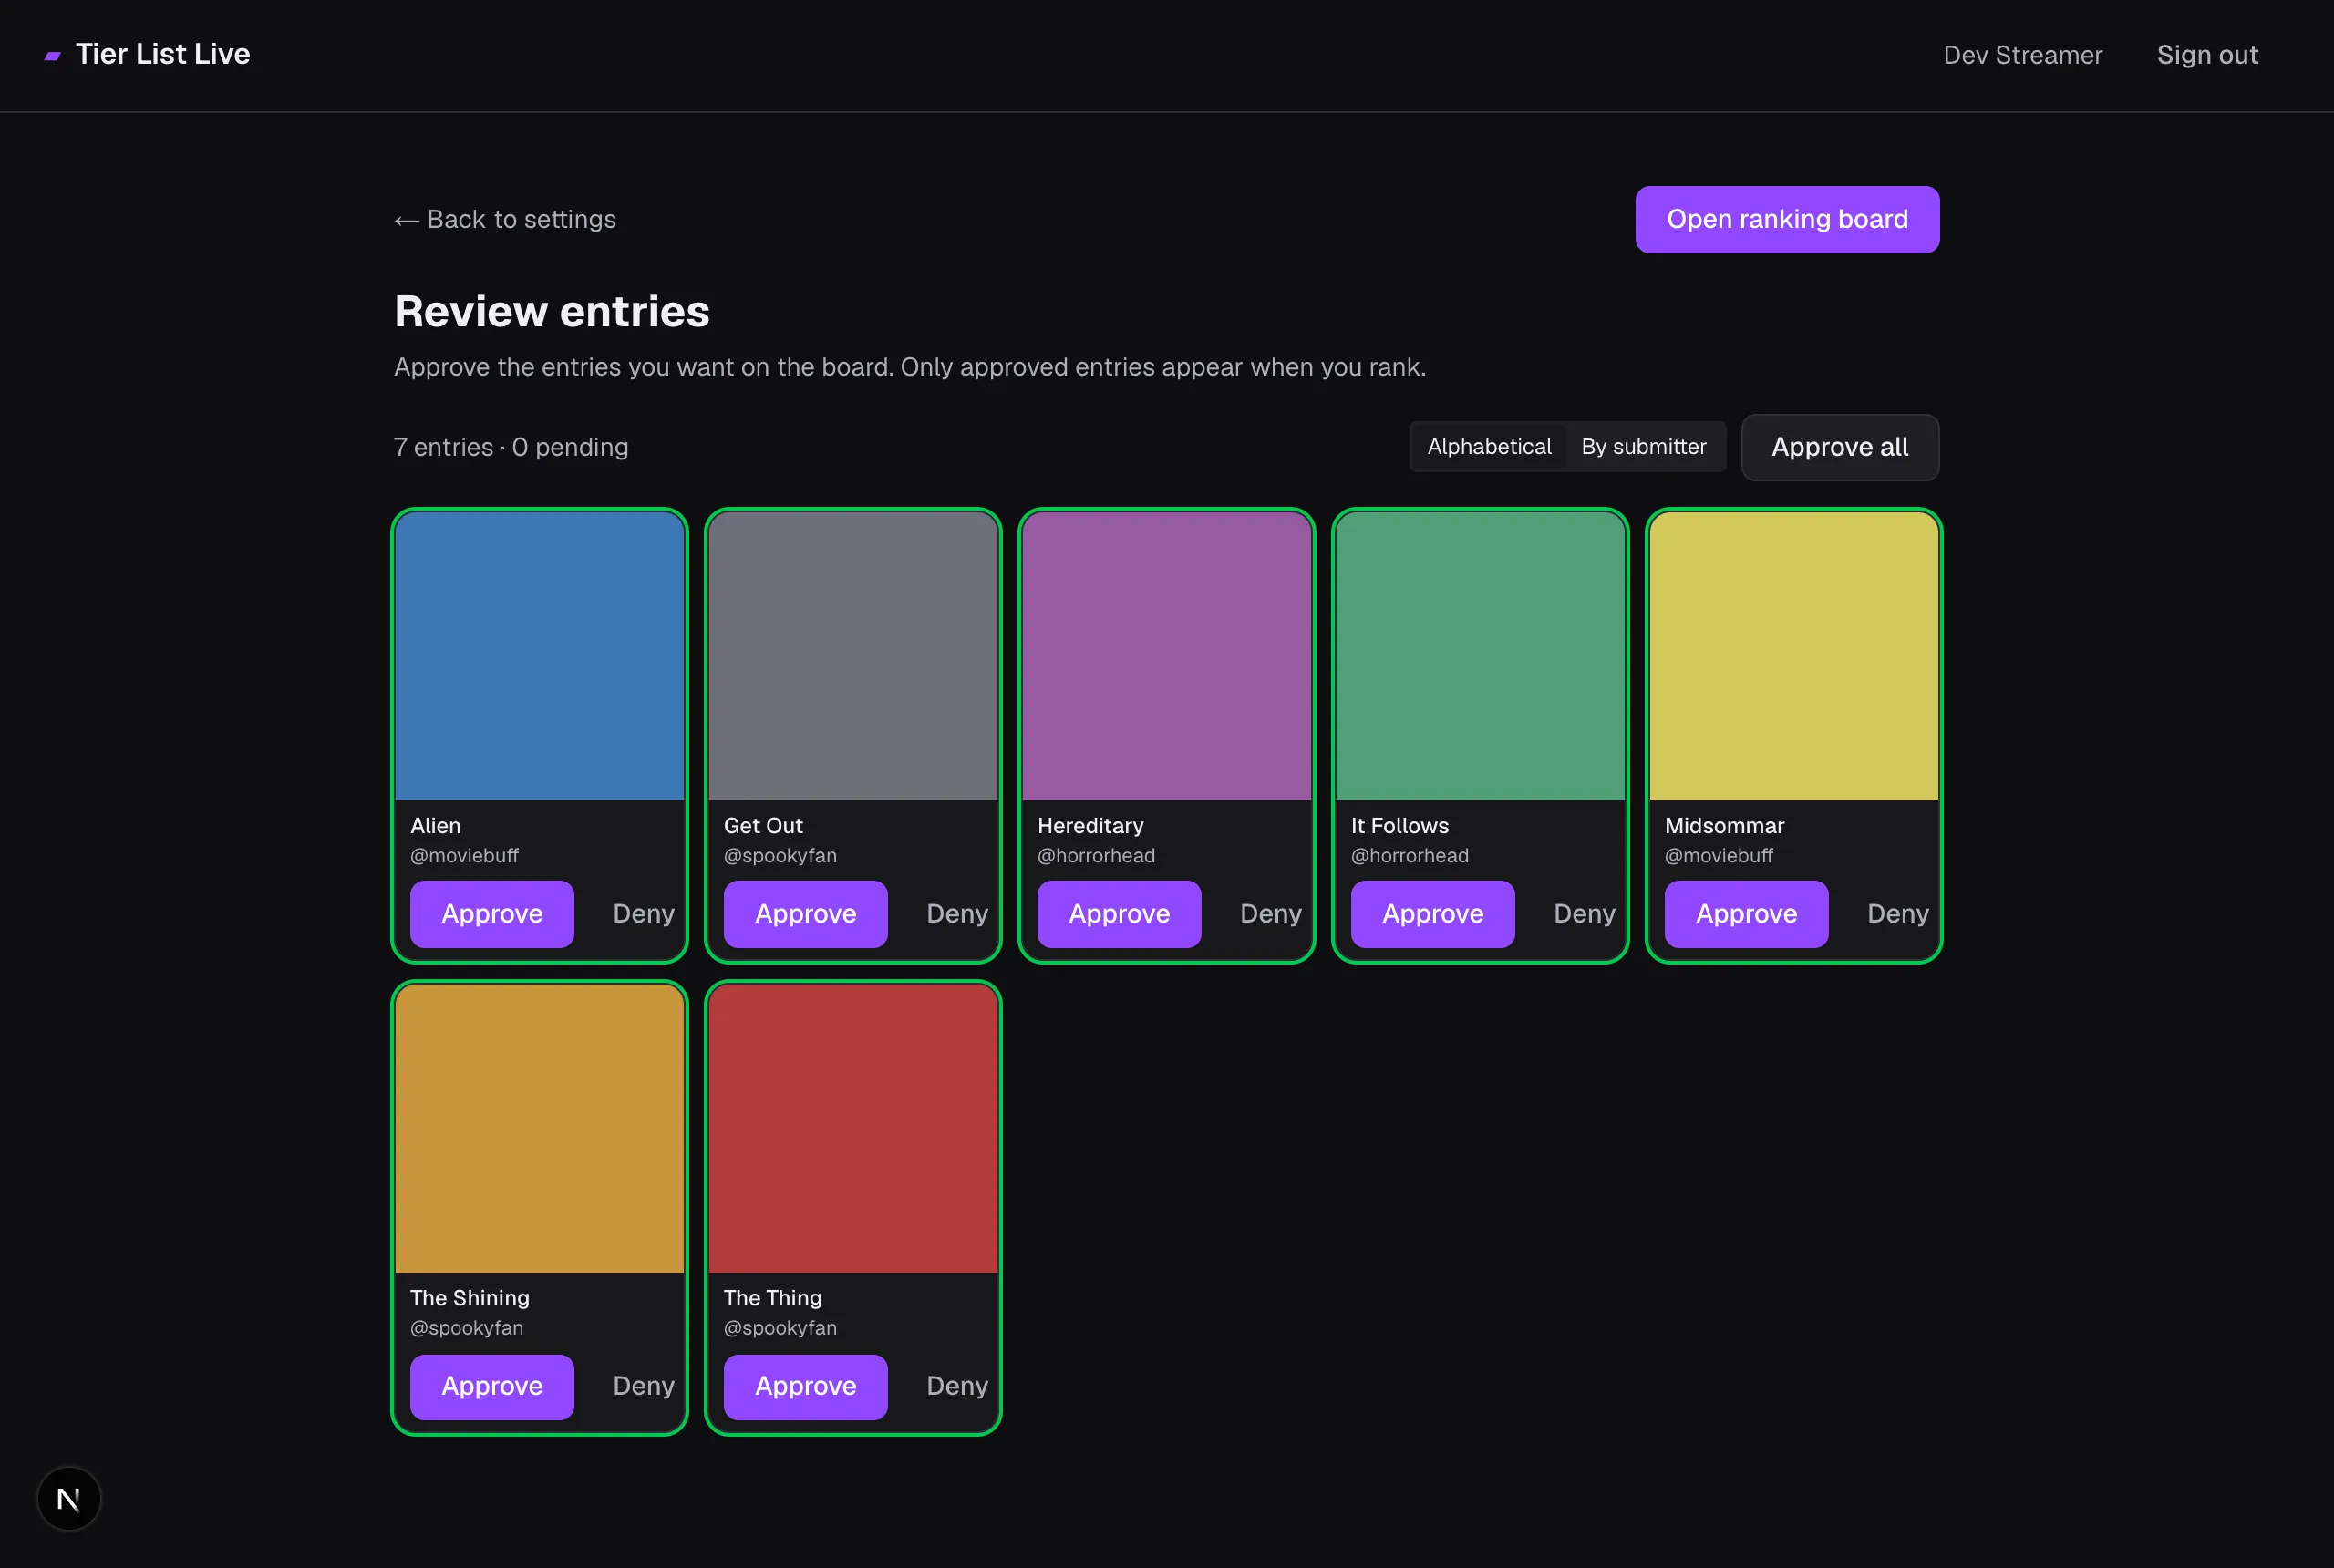
- Approve / Deny each entry, or Approve all. Approved entries get a green outline.
- Sort Alphabetical or By submitter to spot duplicates and repeat offenders.
Rank live on stream
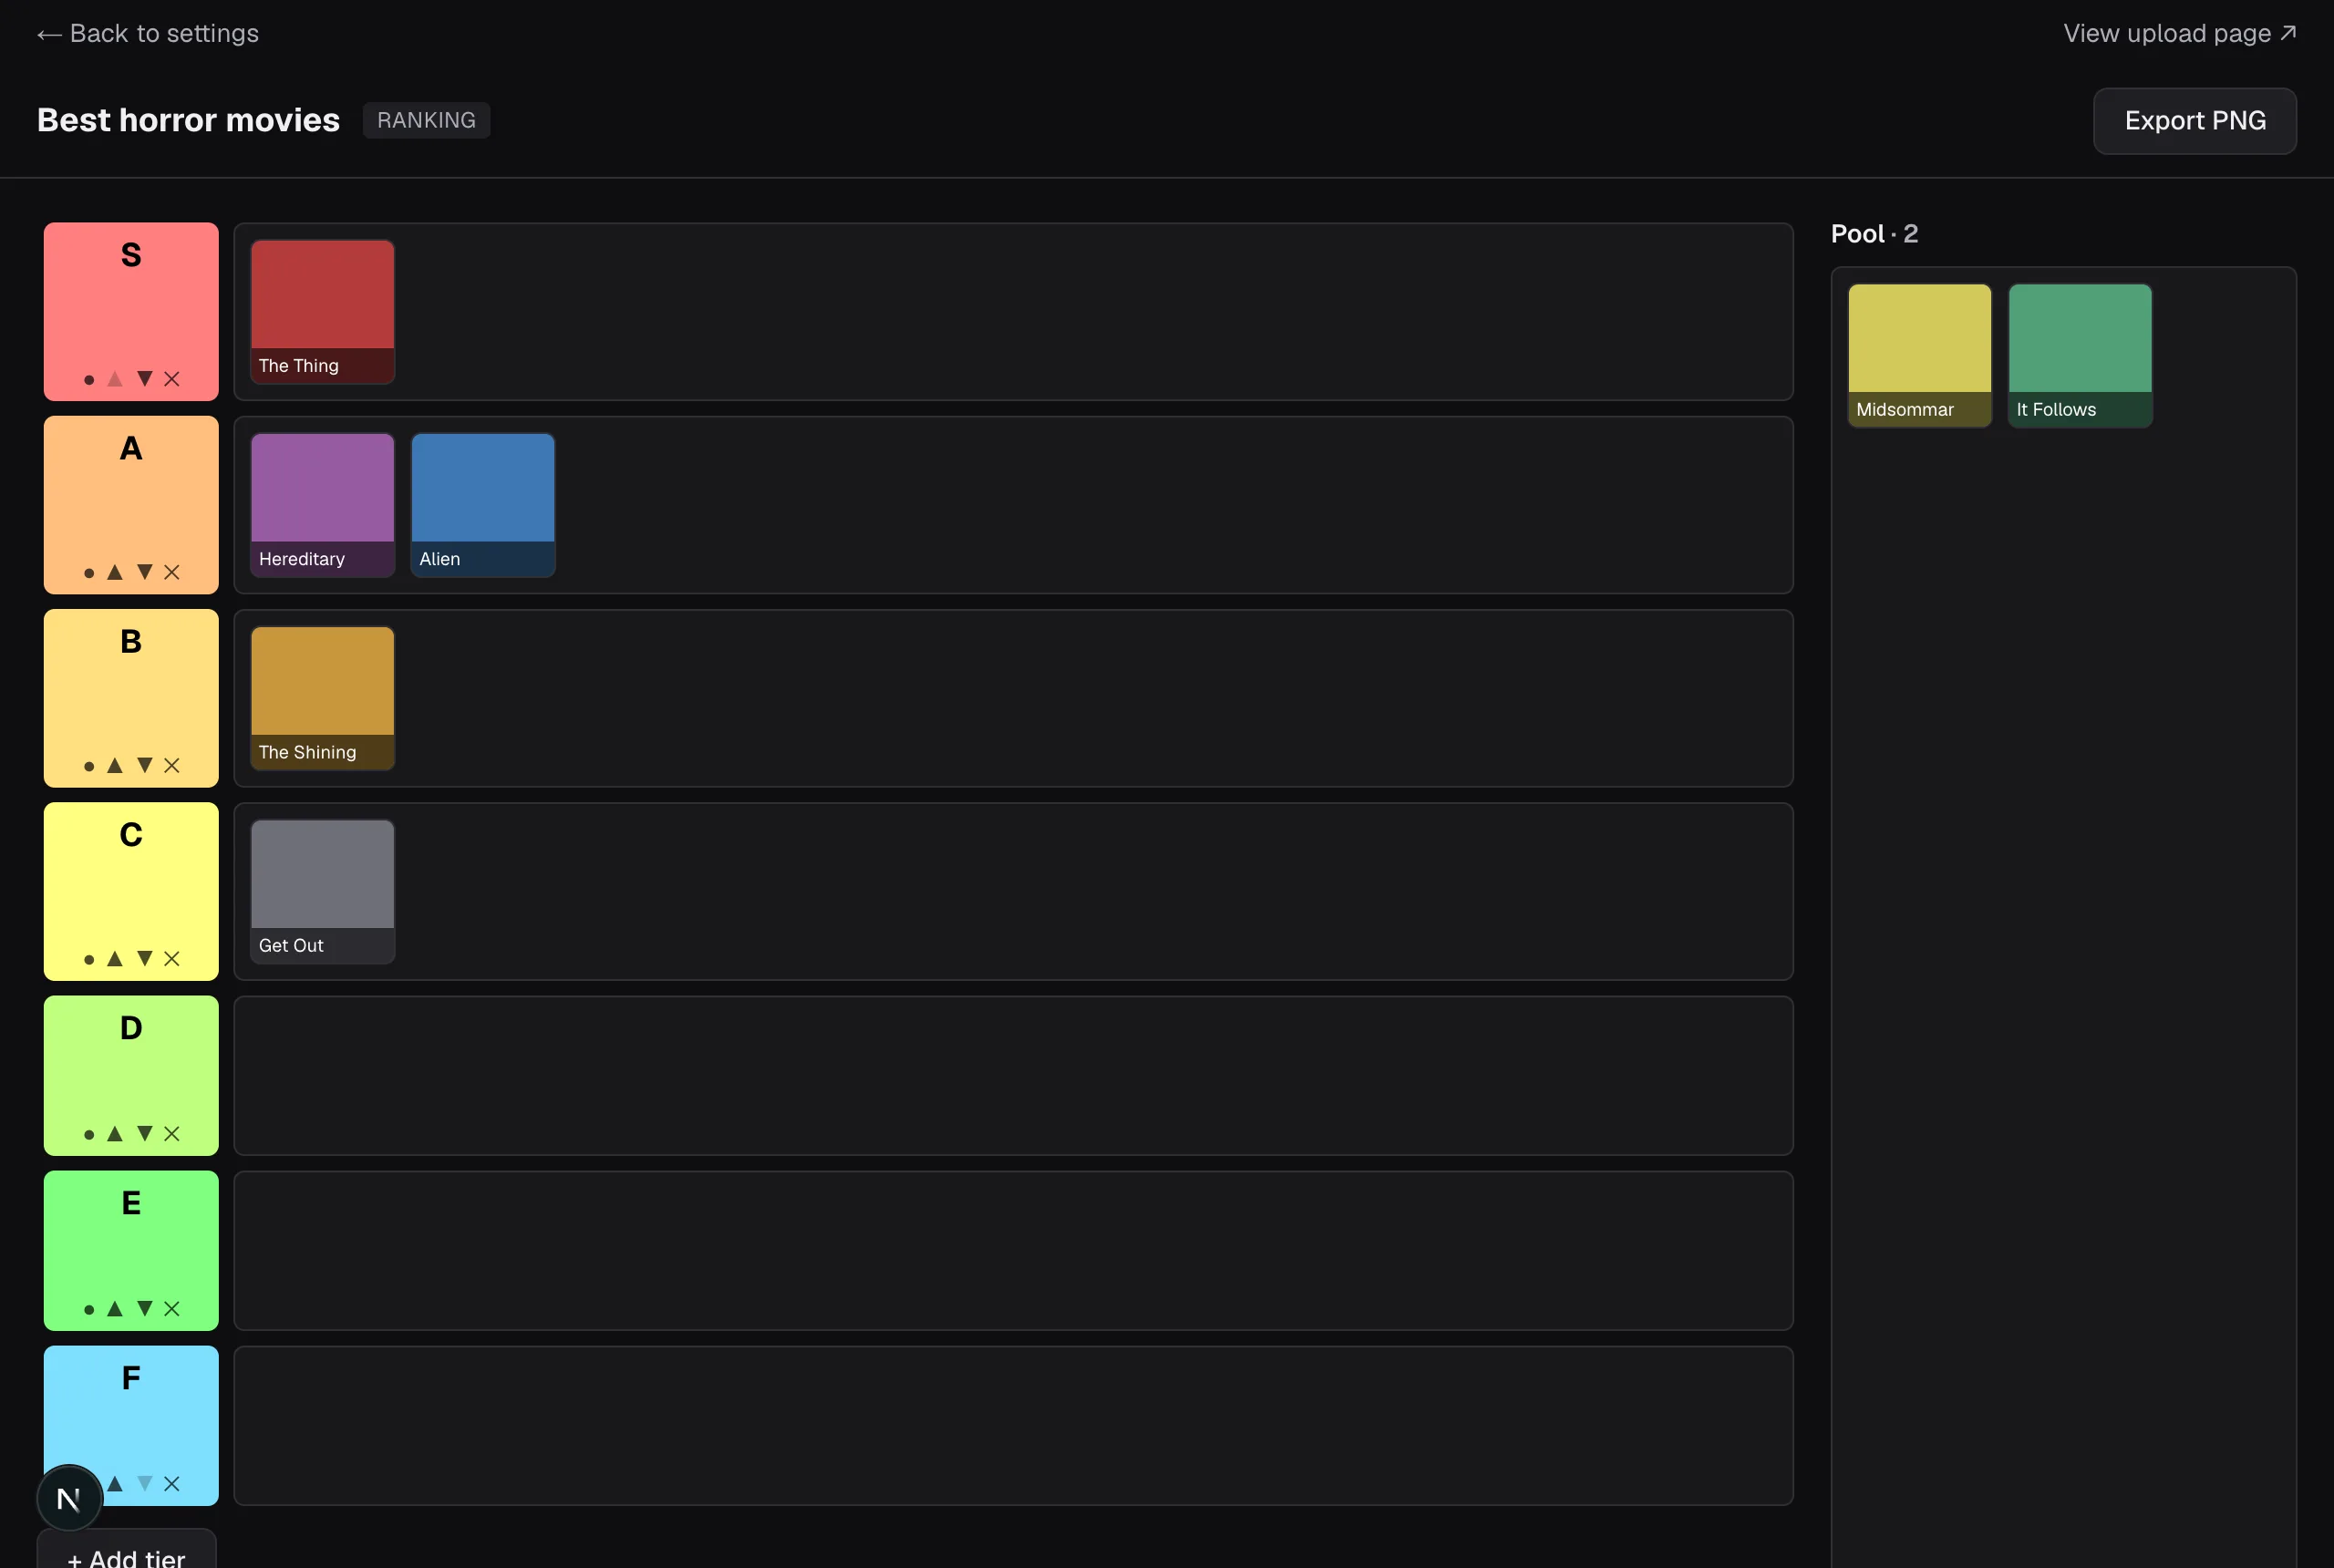
The main event. Approved images start in the Pool on the right; drag each one into a tier row on the left.
Working with images
- Drag an image from the Pool into any tier — or between tiers — to place it. Drag within a row to reorder.
- Hover an image for its Highlight button — that opens a large spotlight view to feature one pick full-screen while you talk about it.
- The remove control sends an image back off the board.
Working with tiers (controls in each colored label cell)
- The letter is editable — click it to rename a tier (e.g.
S→ “God tier”). - ● change color · ▲ / ▼ move the tier up or down · ✕ delete the tier.
- + Add tier adds a row. New lists start with the classic S–F ramp.
Export PNG (top right) renders the current board — tiers and all placed images — to a PNG you can post as your results image.
Wrapping up
- Export PNG for a shareable results image.
- Archive (settings page, while ranking) makes the list read-only when the segment is over. You can Unarchive later.
- Reopen submissions any time to collect another round — placements you've already made are kept.
Moderation
- On the ranking or review screens you can ban a submitter; their images come off the board and they can't submit again.
- Banned viewers appear in a Banned users card on the settings page. Reveal a handle to confirm who it is, then unban to restore their access and images.
Quick reference
| I want to… | Where |
|---|---|
| Start a new list | Dashboard → New tier list |
| Get the share link | Settings → Share link → Copy link |
| Let viewers upload | Settings → Open submissions |
| Stop uploads | Settings → Close submissions & start ranking |
| Approve/deny images | Settings → Review |
| Rank on stream | Settings → Open board |
| Save the result | Ranking board → Export PNG |
| Rename a tier | Ranking board → click the tier letter |
| Add / recolor a tier | Ranking board → + Add tier / ● on a tier |
| Retire a list | Settings → Archive |